
I ran into issues of my exhaust sim taking way too long to sim, so I went back through everything and cleaned it up. Originally I was using proxy geometry for the collisions and had no issues with that. When I added the animation, I did not know how to get the proxy geo to stick to the animated exhaust pipe. I started using the animated exhaust pipe as the collision geometry, but this turned out to be too thin of geometry and greatly increased the sim time. So I looked into finding ways to constrain the proxy geo to the animated geo, and found the copy to points node to do exactly what I needed. More refining will be done, but I will also be starting the turbo flame sim so small tweaks will be presented for this sim in the future.
Some refinements to look into is how one layer of the exhaust is being pushed out way further than the rest, the floating smoke balls, and the general uniformity of the sim.

This network has been cut down significantly since the particle source and the collision geometry have been moved to different containers for organization. This is where the animated car is brought in then extra unnecessary geometry for the sim is removed.

The tube proxy geometry is copied to the animated exhaust pipe. Using the proxy geo allowed me to make my division size higher , speeding up the sim.

Learning from the issues with the collision geometry, I decided to make the particle source geometry separate from the animated geometry. This gives me more control over where the emitter is in the exhaust pipe and how big it is.

The source geometry for the particles is then brought into this container where the pop sim is applied, cached, then converted for use in the pyro sim. While this could probably be in the same container as the source geometry is, I separated it so it is easier for my eyes to follow, and easier to locate issues.

Inside the pop solver, I have added a second layer of particles. Originally, I wanted to find a way to control the drag so that a second layer for this sim wouldn’t be necessary, but due to time constraints, I stuck with just using a second layer and moving on.
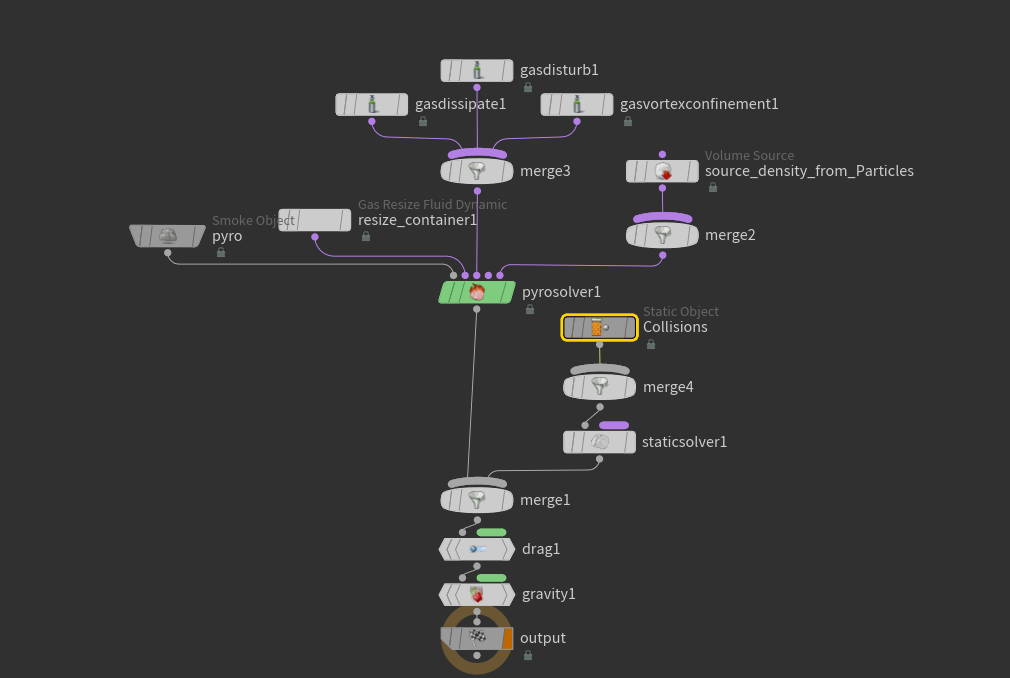
The pyro sim hasn’t changed much since last time. The biggest change would be adjustments to the gas container so that unnecessary space was not being calculated in the sim.